Bourbon Box
A few months ago, my husband found an old decanter I had and decided he was going to keep bourbon in it and keep it stored on the built-in in the living room. It just seemed out of place since we don’t have any other ‘bar’ type of items on display, so I thought I’d build a small box and make it large enough for the decanter as well as 4 monogrammed glasses we got for Christmas.
Of course, my first thought was pallet wood! I’ve had the idea drawn out for over a month, but with the weather lately, it’s just been too cold or rainy to have the garage open to drag out the saw. So, I packed the boards and supplies when I came to South Carolina this week.
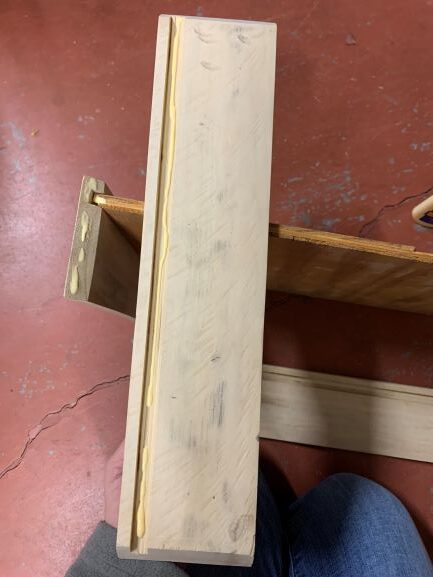
I started with 4 slats and then also used a small scrap of plywood for the bottom. I knew the measurements had to be at least 10 inches by 14 inches on the interior to fit the decanter and glasses, so since the pallet boards are ½ inch thick, I measured 11 x 15 (allowing for a half inch on both sides to miter the corners).

Once those were mitered, I used the table saw to cut a ½ groove about a ½ inch up from the bottom of the boards by setting the blade of the saw up ¼ inch, then setting the guide from ½ inch to 1 inch and one pass in between (three total passes for each board). For the very small strips that were left, I just used a paint can opener to scrape them out (a small chisel wasn’t available, so, use what you have:).
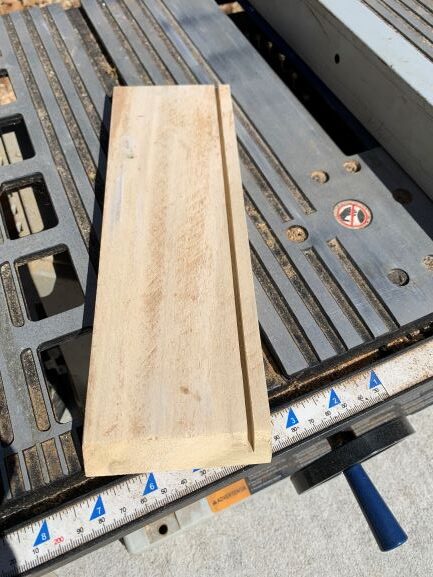
Next, I cut the plywood to 10 ½ inches by 14 ½ inches (which allowed for a ¼ inch overlap to fit in the groove on all sides).

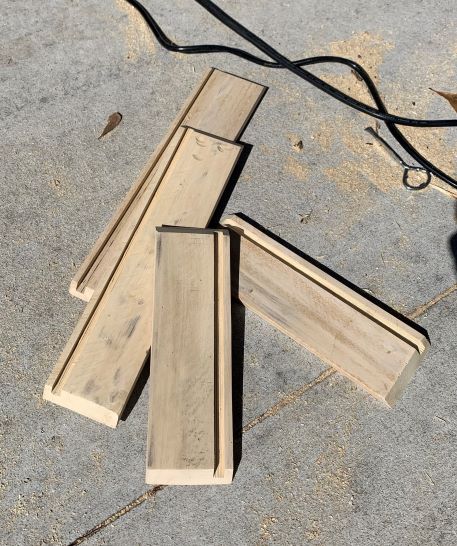
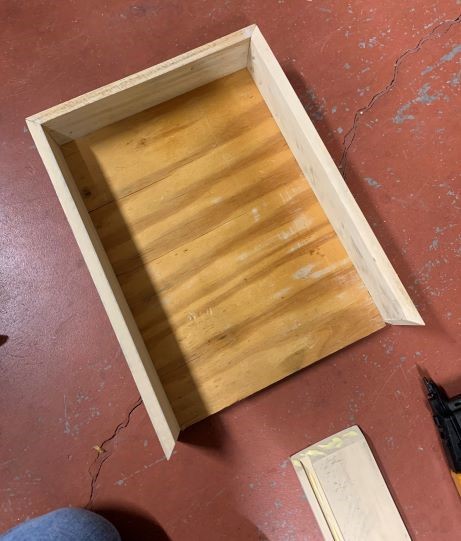
The next step was sanding the boards smooth. Now, it’s pallet wood, so I knew it wouldn’t be perfect, which is what I wanted, but I did want it to be free of splinters and feel somewhat smooth.
Then, I dry fit it all together just to be sure I had all my cuts right. Again, with pallet wood, you deal with some crooked boards and twists and turns, but, in general, it was a pretty good fit!
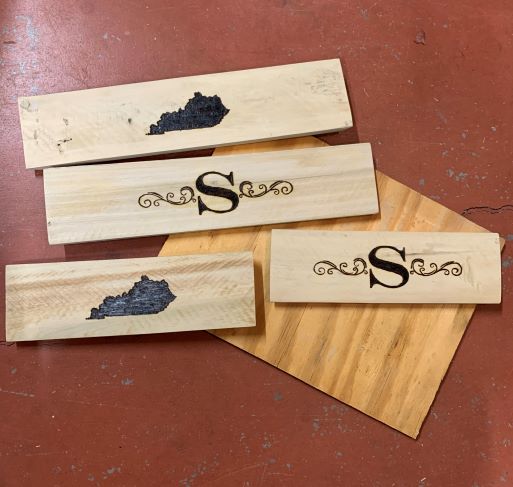
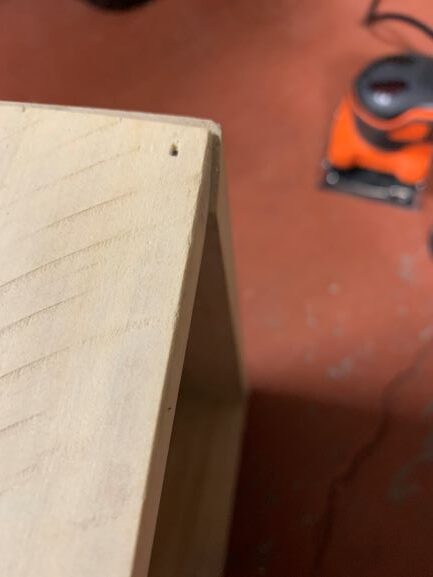
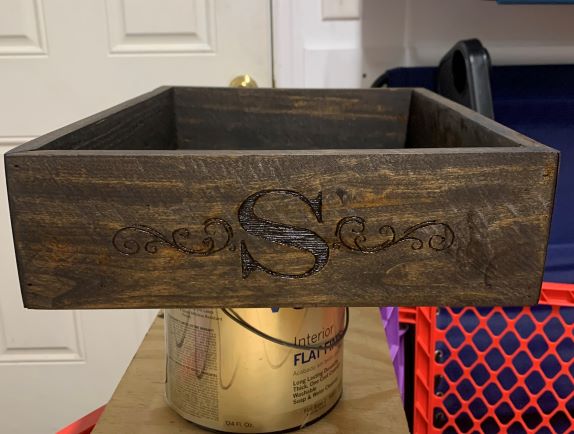
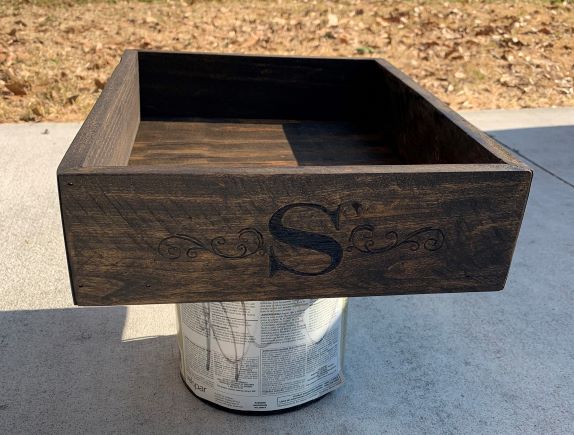
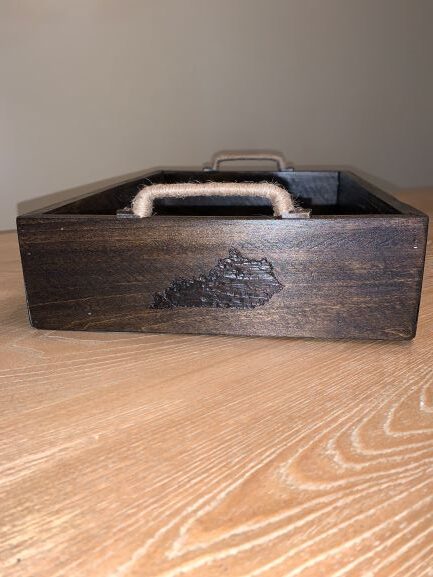
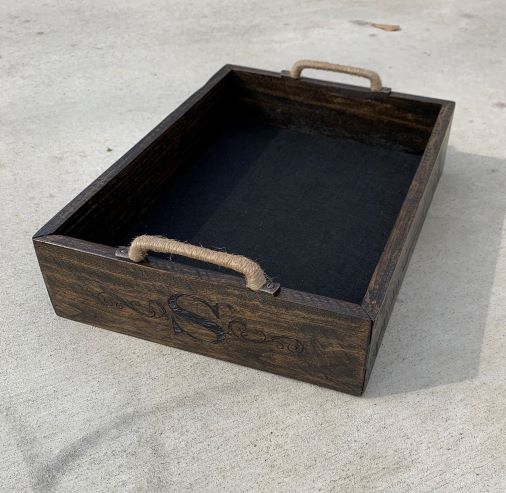
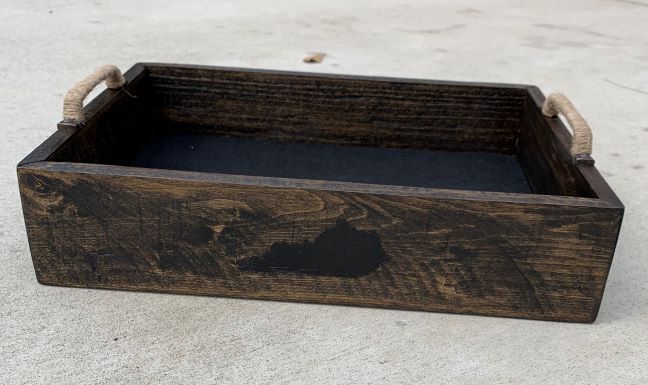
Next, I decided that since this was going to be on display, I would burn a monogram on two sides and the state of Kentucky on the other two sides (I mean, we live in Kentucky, and it’s a bourbon box, so why not??). This drove me crazy because I couldn’t decide if I wanted the ‘S’ on the short side or long side and the state on the short side or long side. I knew this would be displayed at somewhat of an angle so you would see two sides at all times, but one would be more predominant. In the end, I decided to do a short and long side of each! I can turn it to change up the look at any time now!
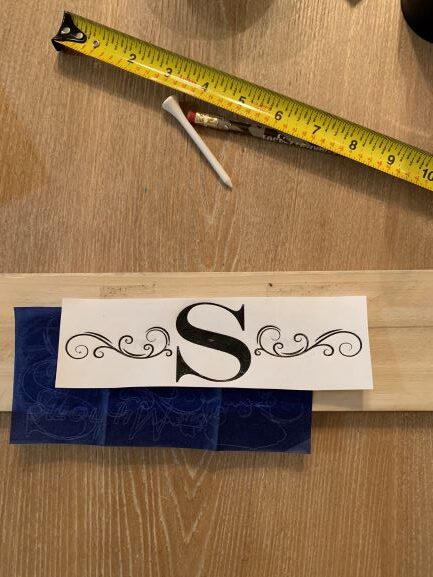
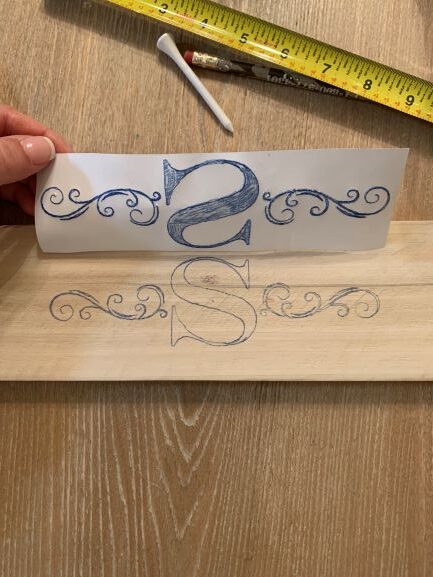
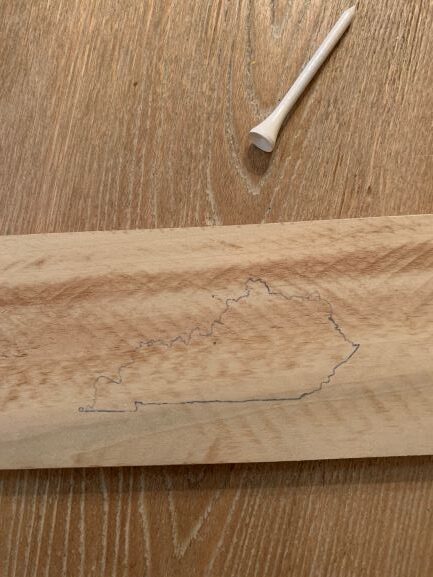
After tracing with the graphite transfer paper, I burned all four boards.
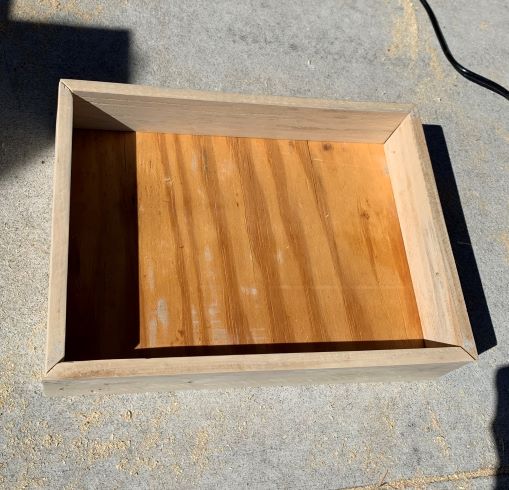
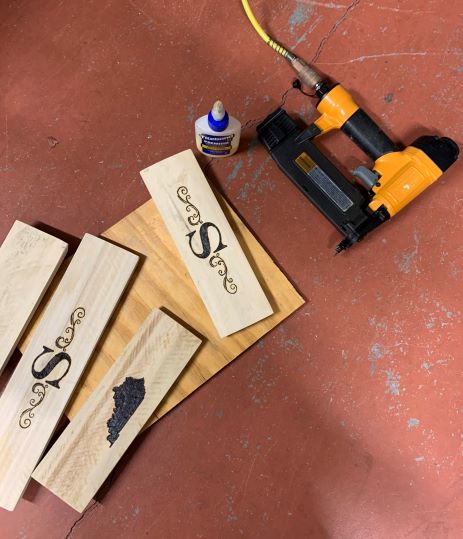
Next was the glue and brads. I ran a small bead of glue down all the grooves and on the corners, then used brad gun and 5/8 inch brads to assemble the box. I started by nailing just the sides together, then, after all the boards were in place, I nailed into the plywood. I then went back and sanded the corners smooth where some of the boards were uneven.

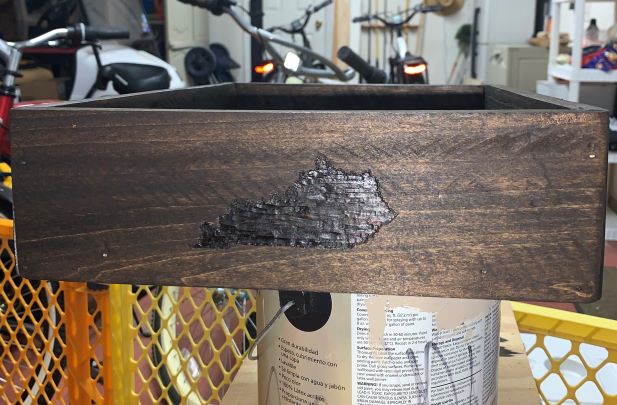
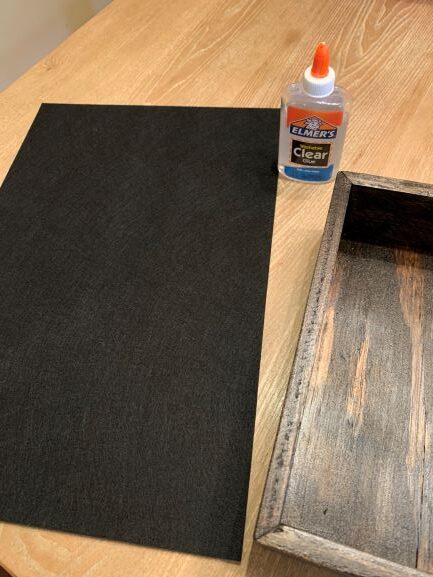
Once it was assembled, I used the dark walnut stain I already had to stain the whole box. Then, once dry, I added a coat of clear polyurethane to the entire piece.

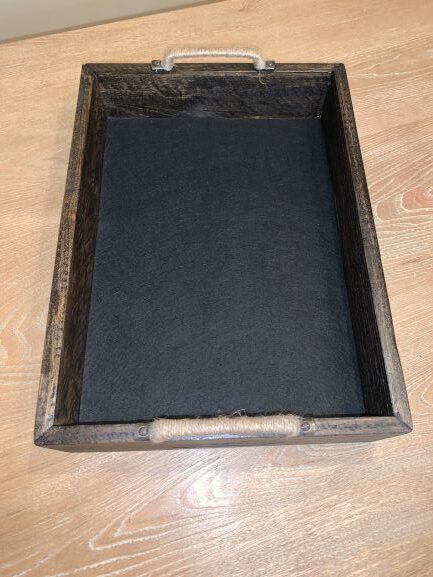
Next, I wanted to add felt to the bottom of the inside since it was going to be holding glass, so I picked up a sheet of black felt at Hobby Lobby for $1. I cut it to 10×14, then dry fit and trimmed some edges to get a good fit. I just used glue to hold it in place.
I also decided to add handles, so while at Hobby Lobby, I picked some up that were half off (spent a whole $4 on both handles). I also picked up a small pack of screws with brown heads to match ($2) to attach them.
The only thing left to add is some small felt circle furniture pads to the bottom, but overall, I think it came out pretty good, especially considering I spent less than $10 on the entire project!

I think if I did this project again, I would use a rag to apply the stain instead of a foam brush so it wouldn’t be so dark, and if it wasn’t going to be sitting on a white cabinet, I would really like it chalk painted and distressed!
What are your thoughts?