Wood Ornaments
This was my first time using my new wood burning tool! If you don’t have one and want one, you can get one for around $40 about anywhere online, local craft or hardware stores. If you don’t have one, feel free to use paints or markers. I was able to get a pack of 5 ornaments for $1 at Dollar Tree – yes, I’m a regular at times at Dollar Tree:) However, since it’s getting closer to Christmas, you can no longer get them in the store or on their website. You can still get them online at other retailers, but I’ve not found any as cheap. Amazon, Michaels and several other places have 4 inch wood ornaments available to ship in the crafts section or in the wood cutouts section of their sites. This is one of those times I wish I would’ve gotten more when I could’ve, but I didn’t have the wood burner at the time….so, lesson learned I guess – or…plan for next year:)
These were super simple to do. The wood burner I purchased had stencils in the pack, but I also did a quick web search for some holly, Christmas images, etc., and printed them small enough to fit on the ornaments. The next step if you’re using a printout is to have graphite transfer paper. Again, my kit came with a few sheets – which would’ve been helpful to know before I went to three stores looking for some. Office Depot carries a pack of the graphite transfer paper for around $10, and the one pack may last me a lifetime since you need very little and can re-use it usually up to two times before moving to another section of the paper.
While I was printing the shapes I wanted to transfer, I also opened Word and typed out each kid’s name and the year ‘2020’ and scrolled thru fonts until I found one I thought I could successfully copy and burn in the wood. After printing a few times to get the right size, I cut them out as close to the name as I could, used a small piece of tape to hold the name and year in place and placed the graphite transfer paper between the paper and the ornament. Again, this was before I was working on this blog, so I don’t have a ‘during’ picture.
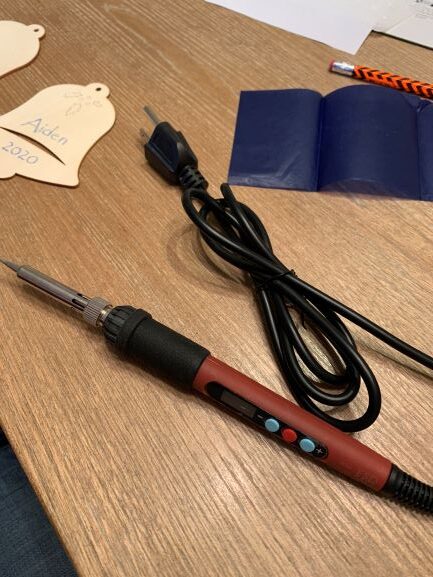
Next was learning to use the tool and which tip did best on the wood. For these ornaments, setting the temp to 500 degrees worked best without having to go back over several times.
I did use a very fine point tip for the design toward the top and a little larger tip for the names and year. After watching several videos on wood burning, the best suggestion I found was to have a small piece of wood nearby to test before starting any project!

While not perfect, not too bad for a first attempt! The only thing left to do was a quick spray coat of poly to seal them and now we have personalized ornaments for 2020!
I think these would be just as cute painted.