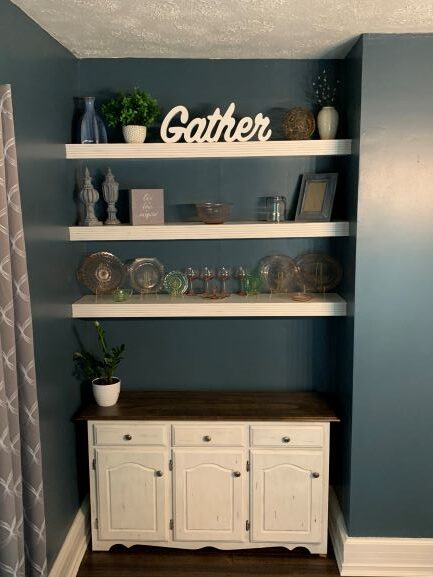
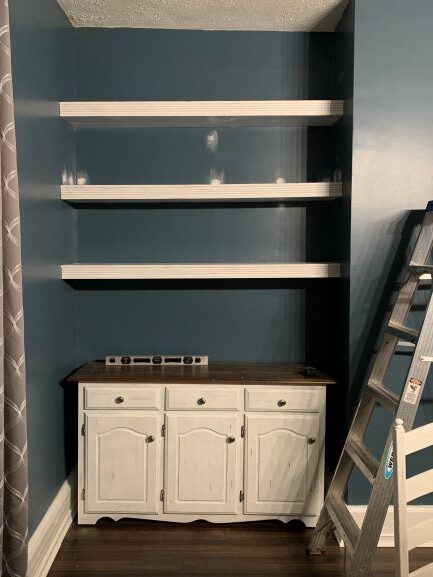
Custom Floating Shelves
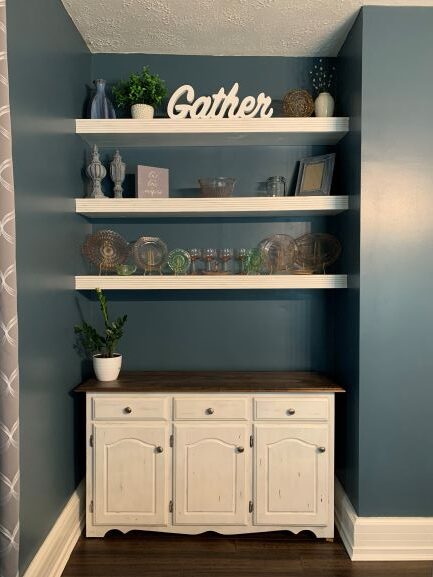
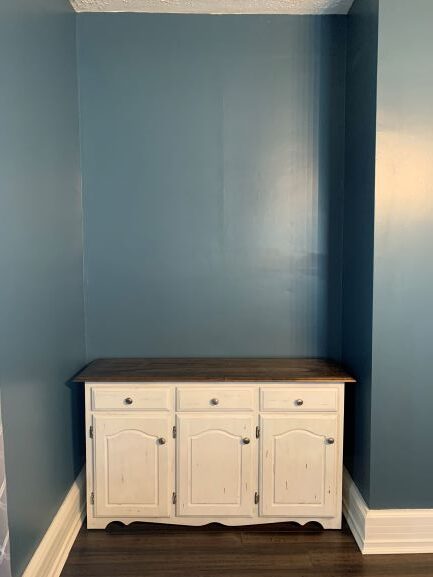
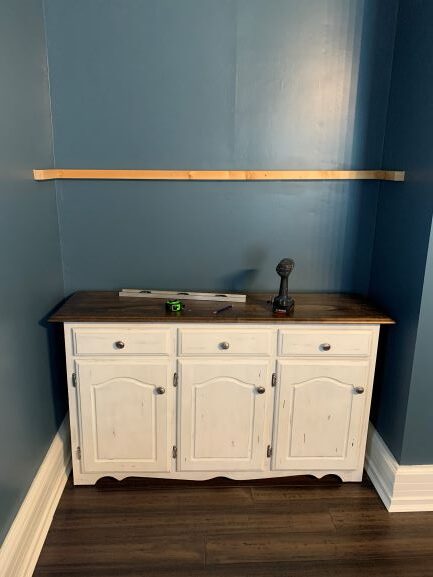
When we first moved in to our house, I thought the little alcove in our dining room would be a great spot for a tall hutch. I started looking for one that I could refinish to match our table, but I kept coming up with the same two problems with all the ones I found, either they were too wide for the space, or, they were just not tall enough to fill the space. Our ceilings are pretty tall (about 9 feet), so, most hutch cabinets that fit the width measured between 5 and 7 to 7.5 feet in height. It just seemed like it was going to leave so much empty space at the top, so when I found the small buffet cabinet I refinished months ago, I thought I could use that, then install some shelves above it!
When I was planning in my head, I thought three shelves spaced fairly evenly would give us plenty of display space as well as utilize the height of the space well, so that was the plan. I also knew I didn’t want brackets showing at all, so I had to come up with a plan to make them seem ‘built in’ or ‘floating’ but still be stable to support glassware and other items (and the actual wood itself).
I decided to use the entire width of the space and use 2×2’s as my wall supports. By running a 2×2 along the back of the wall, then a small piece on each side (I just used some small scraps about 8 to 9 inches long), I would have enough support and be able to conceal the support by using a shelf on top AND on the bottom of the 2×2’s.
We did have to purchase 1×12 inch shelving boards, however, my husband found some that were cheaper because they were made for roof sheathing. Now, they were not the best looking boards, but they were going to be painted anyway, so it worked out fine!
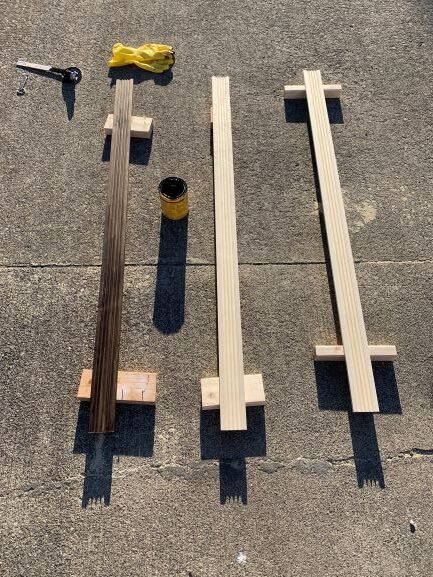
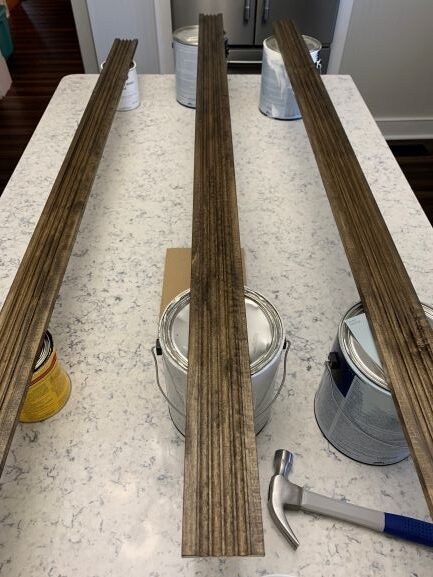
For the front of the shelves, I measured the 2×2’s (1.5×1.5) and both 1 inch boards (actually closer to ¾ of an inch), which gave me with a 3 inch total height to cover the front of the shelves. We found a 3 inch piece of molding at Lowe’s to use and purchased 3 of them (they were only 8 ft. boards and the alcove was nearly 5 ft. wide).
Now, as I’ve mentioned before, there’s not a wall, ceiling or floor in our house that is exactly square and level, so, after I measured out the placement of each shelf, I measured the width to cut the shelving boards and the molding front for each one. I decided space the shelves out roughly 16 inches with a little more room left under the bottom shelf for any larger items and a little more room at the top as well. (Don’t forget when measuring to allow for the total height of all boards you’re using, so from the top of the 2×2, I had to allow for the 1 inch board on the top as well as the 1 inch board on the bottom of the next shelf to mark the spot for the bottom of the next 2×2. I didn’t do this and ended up patching the wall in a few places after I had to reposition the supports. I used 3 inch screws to attach the 2×2’s to the wall.
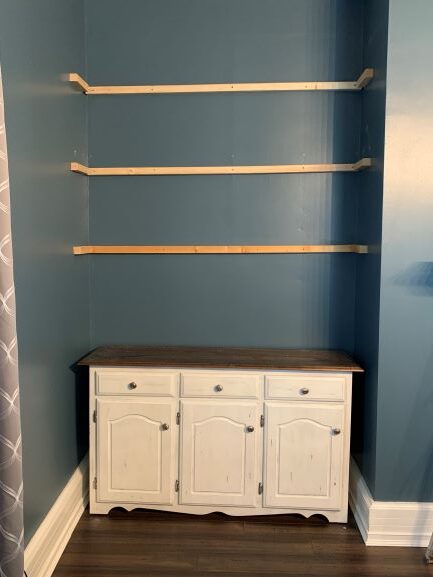
We did level each shelf as we worked our way up, which in the end maybe wasn’t the best solution since it did make the unevenness of the floor and ceiling stick out a little more than it did before, but honestly, I’d rather have straight and level shelves and adjust the décor to somewhat mask the unlevel ceiling than have crooked shelves all the way down the wall.
One all the 2×2’s were in place, and all the boards were cut (I did mark the back of each board so I knew which ones went on the top, middle, and bottom), I used an enamel based trim and door paint for the 1×12’s.
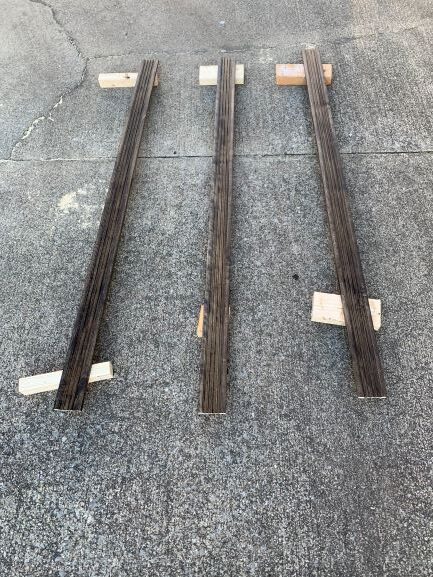
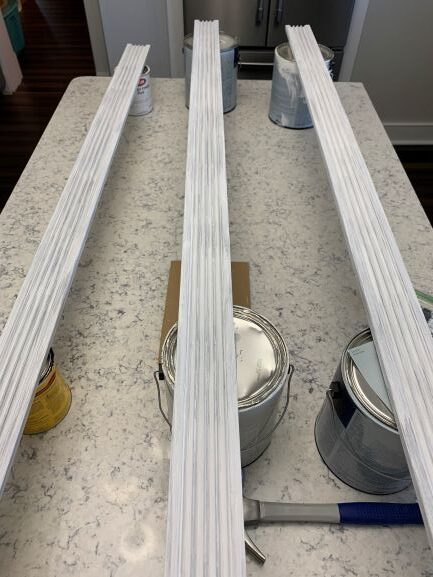
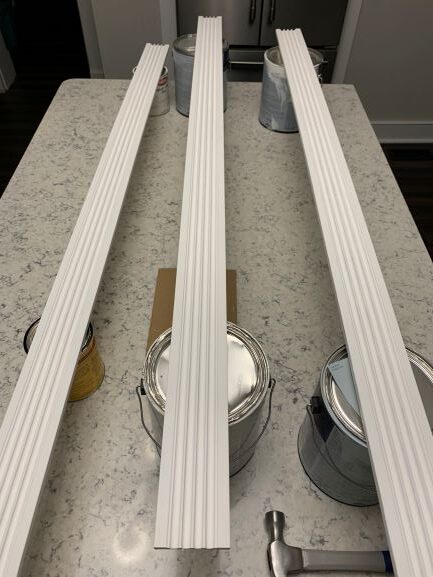
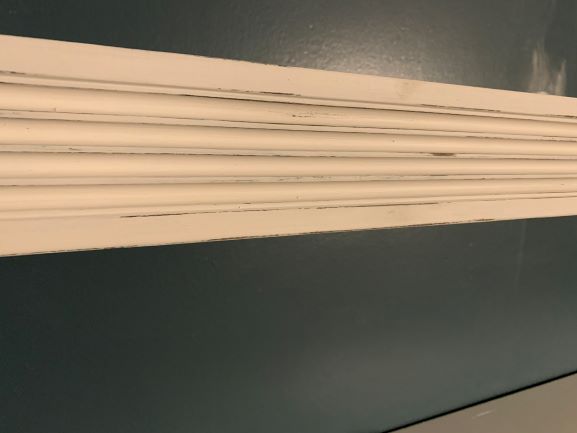
For the 3 inch molding, I decided to use the same process I did for our dining room light, so I stained them first with the walnut stain I already had, then, used white chalk paint (3 coats). After that was dry, I took them outside and lightly sanded to give them the distressed look I wanted, then wiped them down and waxed them.
To install the 1×12 shelving boards to the 2×2’s, I used some 1 5/8 in screws I had in the garage, and sunk them just a bit so I could fill and paint them so they wouldn’t be seen. Then, for the molding front, I used the nail gun to attach each piece to the 1×12’s, then went back and filled those holes as well.
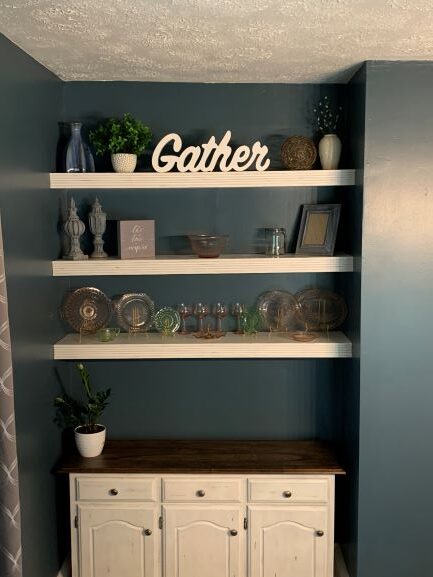
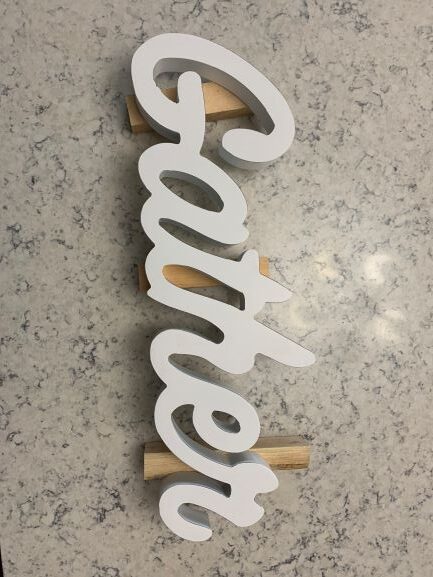
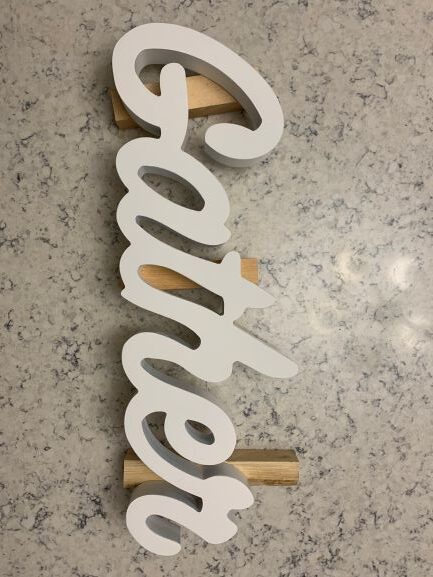
Honestly, my biggest dilemma with the shelves was not building them as much as what to display on them! I am terrible with décor and I always feel like everything needs to have a purpose or a meaning, not just something to look at….well, I’ve been looking for things for months and I did break down and purchase a few things that are more ‘for show’. For example, I purchased the large ‘Gather’ sign, but it was really glossy and compared to the molding, it stood out as super white when I put it on the shelf, so I gave it a quick coat of chalk paint to take off the gloss. To me, it still seems ‘too bright’, so I think I may go back and give it a coat of grey chalk paint at some point.
I also purchased a vase, a few plants, and some other decorative items. Then, I remembered my mother saying she had some depression glass and she had some of my grandmother’s depression glass that was just sitting in boxes, so I decided to try to incorporate a few pieces of each. I ordered some small easels on Amazon (around $12 for 6 in assorted sizes) and found some various pieces of my mothers and my grandmother’s plates, bowls and other items to display.
I do have a few other unique pieces that I’m saving space on the middle shelf for, but that requires a whole other project to get them ready for display, so hopefully I’ll get to those soon:). And, I just found a white and grey distressed looking vase to swap the cream color one on the top shelf! I also need to decided on a photo or something to put in the frame on the middle shelf and something to fill the clear glass jar next to it.
Overall, I’m pretty happy with how they turned out and it gets my dining room one step closer to being finished! I have one huge project going on now for a pretty large display/storage piece in the dining room that I can’t wait to finish and am HOPING it comes out like I want it to. And, I have been on the hunt for a small, comfortable arm chair, a small table and a floor lamp for the other corner, but so far, nothing has struck me as a must have just yet! Either way, one more project done & we’re so close to having this room finished:)