Upcycled Two Tiered Rolling Cart
Several weeks ago, while scrolling through FB Marketplace, I saw this two tiered cart (pictured below). I thought it was cute and with some work, could be a nice Mother’s Day present for my mother (because she’s impossible to actually shop for). After some discussion with the seller, we agreed on a lower than listed price and we went to pick it up!
Now, of course when we got it, it was not exactly like I thought from the pictures (one day I’ll learn that it never is:)). The paint was a speckled black, the handle to push it was missing completely and it was definitely dirty from storage or use (or both). They did have the glass shelves already out and packed in a protective case, so that was nice (I only put them back on at home to show a true before picture).


Step one was to take the glass shelves back out and remove the rubber pieces that were supporting them. Then, I took a wire brush to the entire thing to get any excess dirt, chipping paint, etc., off the cart and then wiped it all down well.
Next, I gave the entire cart a good coat of gloss black paint (using spray paint). Because of issues in the past, I just did small light coats here and there over a few hours so there were no runs or drips (the can says it doesn’t drip or run, but that was not true on the toy box for sure).

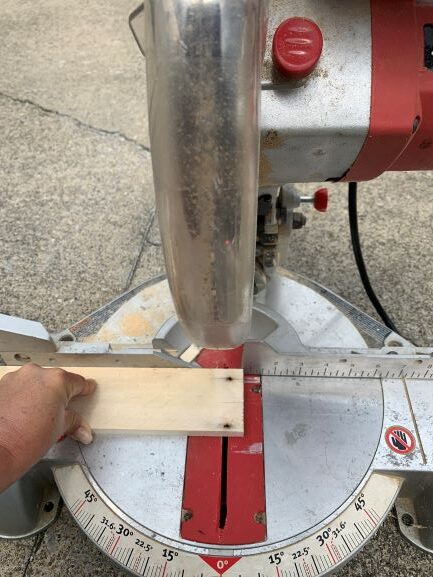
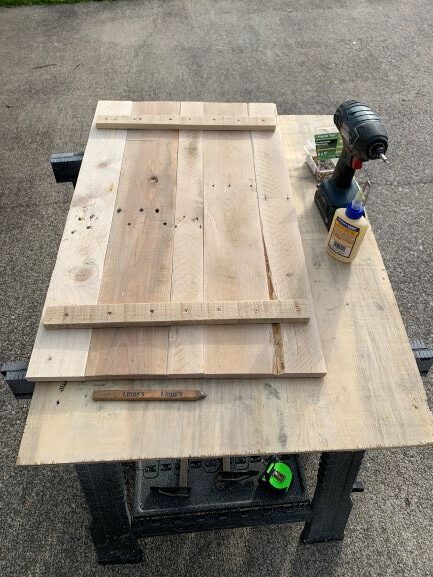
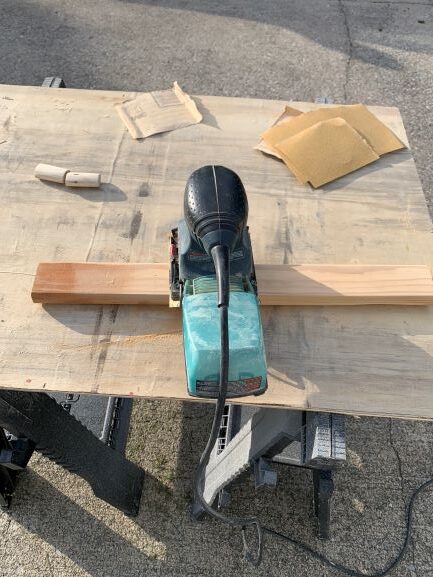
For the shelves, I knew I wanted to do pallet wood, so I took apart a pallet we had in the garage to get the amount of boards I needed. Each shelf measured 18” wide by 30.5” long. Of course the boards were not the straightest, so I did have to run them thru the table saw in an effort to get a tighter fit, and to get the 18” in width I needed.
After the width was set, I cut each board to the 30.5” length by cutting away the worst parts of each board.
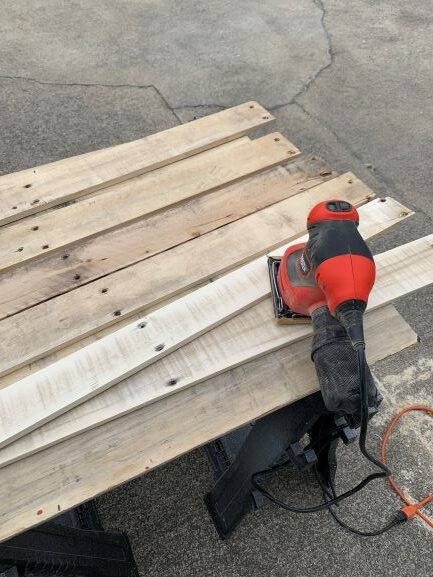
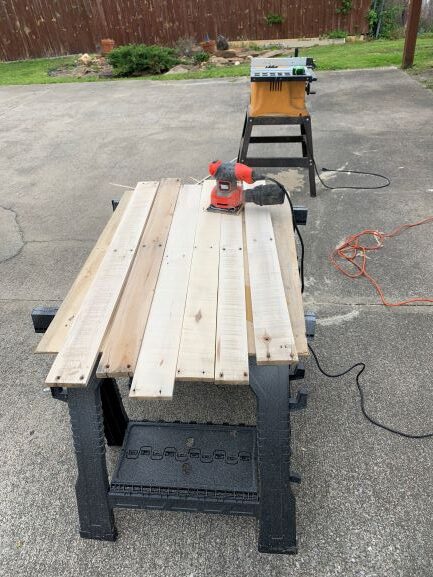
The next step was sanding all the boards as smooth as possible. I wanted a rough look, but not so much a rough touch, and since some of the boards were thicker than others, on the bottom shelf, I did have to use a belt sander to get it closer to even. They still aren’t perfect, but pallet wood never is:)
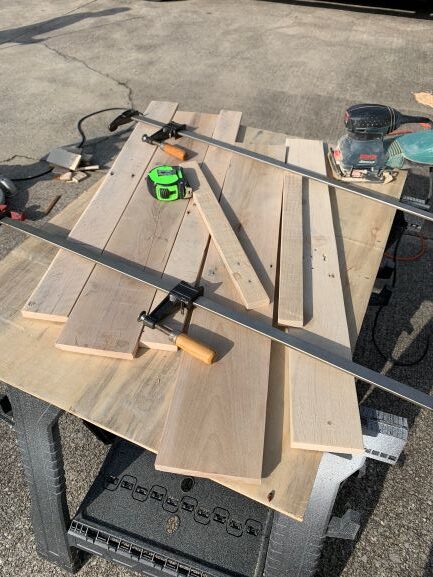
To attach them together, my original plan was to use a biscuit joiner, but the pallet wood was too thin and the biscuits would’ve been too close to top of the board (I was afraid it would actually make the boards weaker and the biscuits may pop thru the top). So, I decided to just use wood glue between each piece. Then I used a large clamp to bring them together tight and attached two small support boards to the underside of each end of the shelves (I did measure out from the edge of the cart so the supports wouldn’t be on the corners or be on the bracket pieces that would hold them in place). For the support boards, I just took a few small scrap pieces that were about 1.5” wide (left over from another project) and cut them to about 17″ to use under both ends of each shelf. Even though they wouldn’t be seen, I did sand them down to knock off the rough edges as well before I attached them.
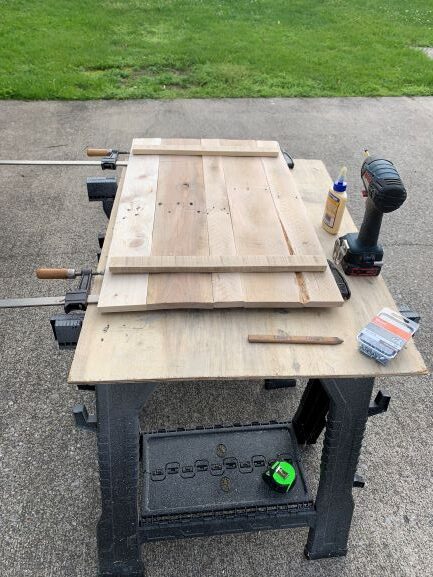
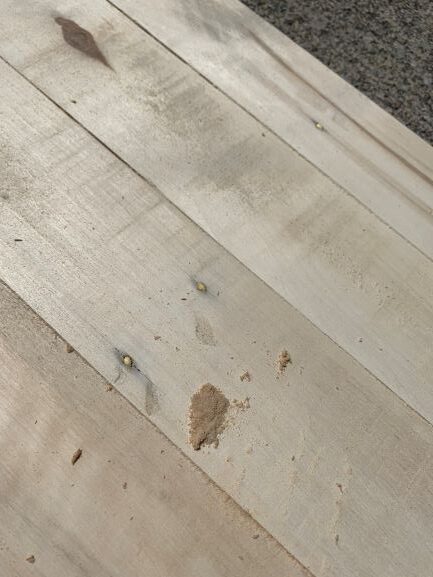
After they were all glued and screwed, I took some wood glue and put just a little in each hole and then used some of the sawdust to fill the holes a little. I could’ve used wood filler, but the sawdust and glue were sitting there, so I just took a small pinch and used my finger to kind of mash and rub it firmly over each hole. Some stuck, some sunk in, but that’s ok. I did the same with a few of the gaps between boards, mashing the glue and sawdust mix down to make it a little more seamless.
Then, I had my husband hold each shelf under the area it was supposed to go and I marked the rounded corners off with a pencil, then cut them with a jigsaw and sanded all the sides down well. (I don’t have any pictures of this part since we both had our hands full:))
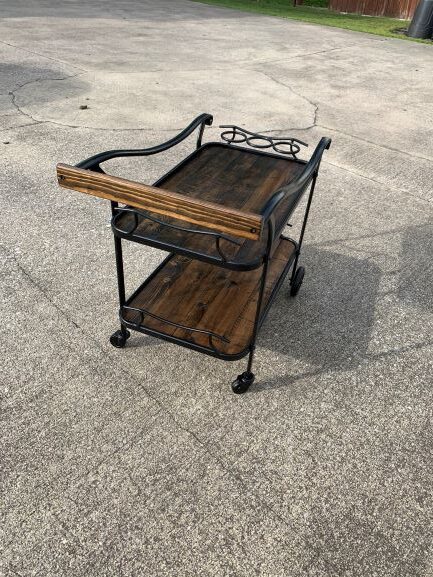
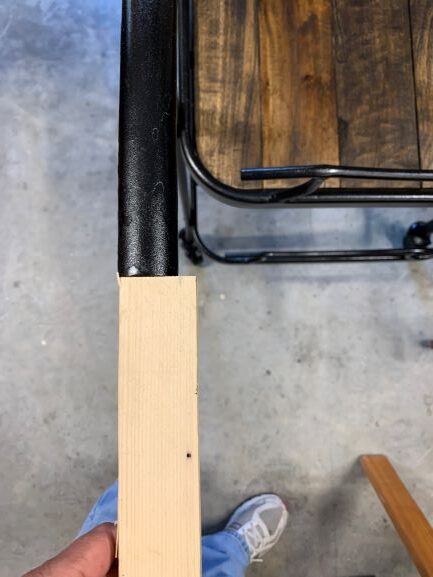
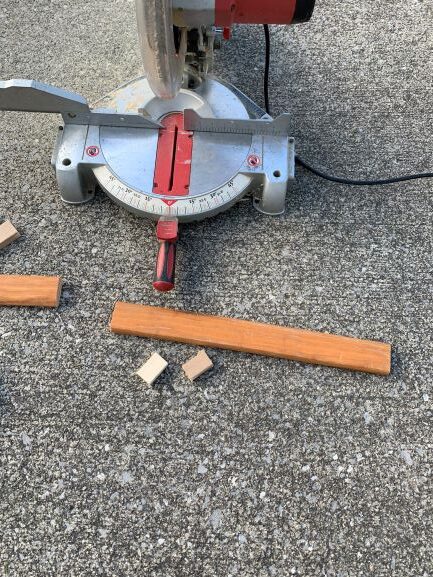
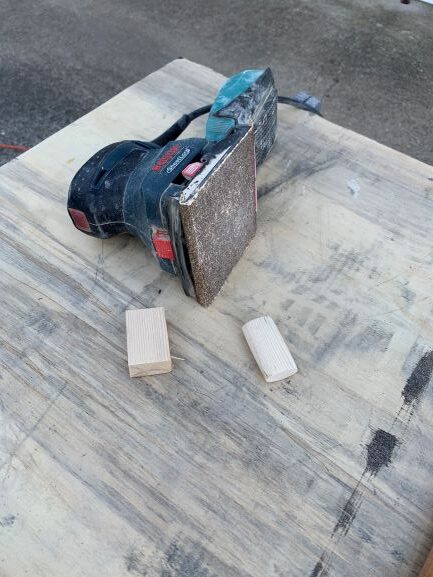
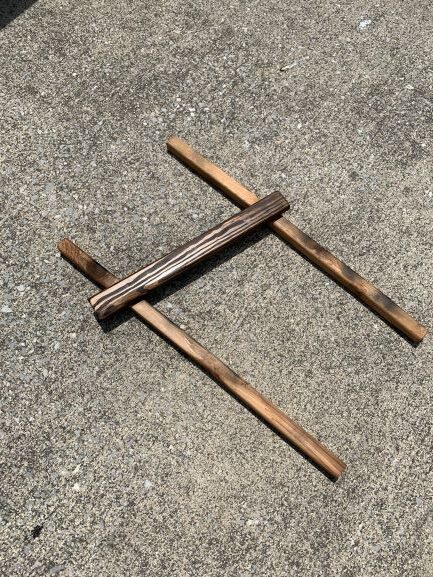
For the handle, I knew I needed something long across as the actual ‘handle’, so I checked in the garage and found a piece of the ‘free wood’ I had picked up (same bunch of bed pieces I made the Lego table from). Then, I knew I needed something to fit inside the oval shaped holes to actually attach the handle to. I found some scrap wood and marked the width and cut down as much as I could until I had somewhat of a small rectangle to work with. The only way I could come up with to make this an oval was to sand it down. I used a 50 grit sandpaper on the palm sander and while holding the block I the other hand, I sanded….and sanded….and measured….and then sanded some more, until I had a shape that would fit tightly in the oval opening.
To finish it off, I needed to stain the shelves and the handle. I used the dark walnut stain I already had on the top and bottoms of the shelves, and the handle as well.
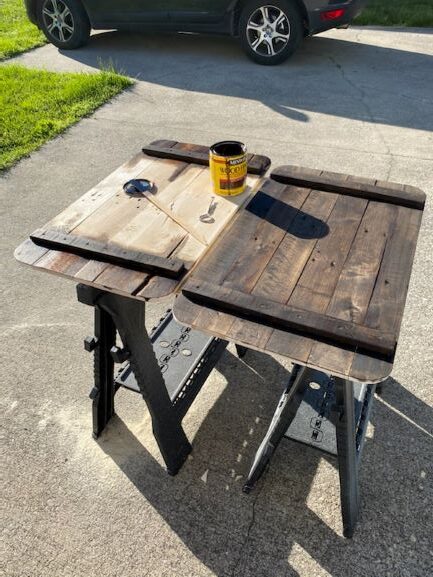

Now, knowing that this was going to be used outside, possibly with plants, or even drinks on it, it needed to be sealed. I used the polyurethane I already had to put one coat on the bottom of the shelves and two coats on the tops and sides of the shelves. The handle also got two coats all the way around.
The last step was actually attaching the shelves and handle to the cart. For the handle, I tapped in the sanded down wooden pieces into the oval opening with a rubber mallet and had my husband hold the handle in place while I drilled a small hole on each side through the handle and into the oval wood supports. Then, I set the handle back on my work surface and drilled a shorter hole on top, but with a wider bit in order to countersink the screw heads. After the handle was in place, my husband added a small screw to each underside of the oval pieces to hold it in place (there was already a hole there on the underside, most likely to hold the original handle). Then, I just took some stain and touched up around the screw heads where the wood had been drilled out so it would blend well.
For the shelves, I used the holes that had originally held the rubber supports for the glass shelves and used short screws to attach each shelf from the bottom for stability.
For the shelves, I used the 4 pieces that had been used to hold the rubber supports and ran short screws in from underneath to hold the shelves in place.
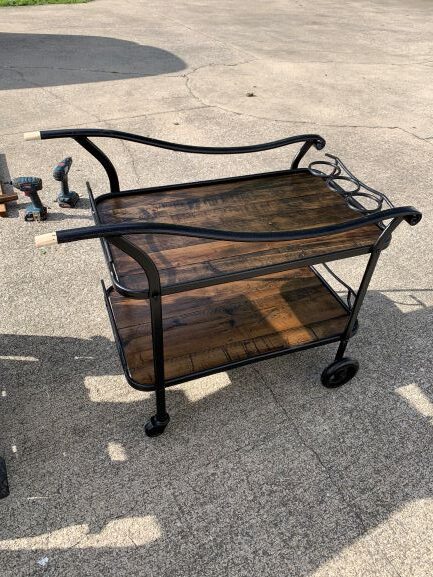
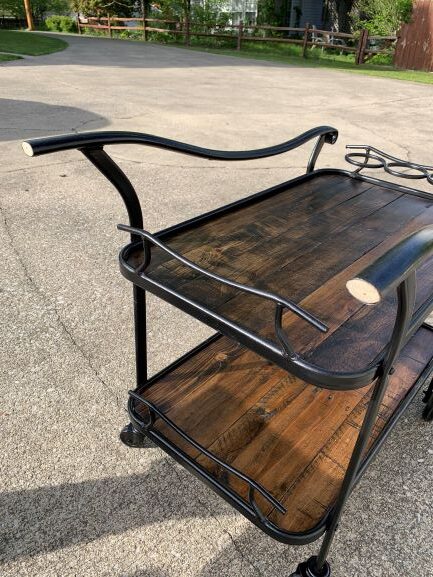


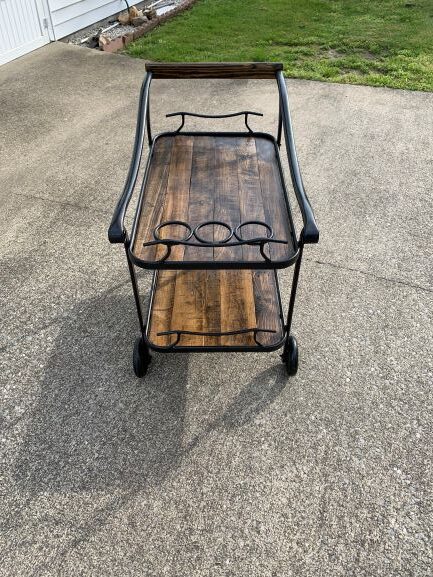
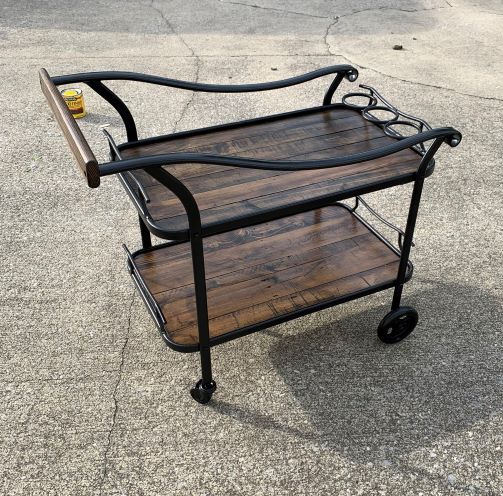
Overall, I love how it turned out!! And, while it did take some time (with all the cutting and sanding), it was a fairly simple project to do.